Webex Meeting Views and Features
How to Customize your Layout and Use Screen Sharing During Virtual Meetings
On this page
Webex offers several views and features to use during your virtual meetings. This article identifies some of those options and provides instructions for how to use them.
Guide
Layout
The Layout button in the top, right corner of a live meeting offers different views and settings available during live meetings.
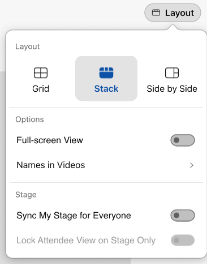
There are three different views inside of Webex Meetings:
-
Grid view
- View up to 25 participants at a time
-
Stack view
- Current speaker is the focus and other participants are at the bottom
-
Side by Side view
- Current speaker is the focus and other participants are on the right
The Stack and Side by Side views have customizable views and other options available to choose from.
Screen Sharing
If you are sharing content that includes motion and video, select the Optimize for motion and video option. If you are asked to install an upgraded audio driver, follow the prompts after entering your computer password.
All participants have the ability to share their screen by being a presenter. To share content…
- Click on the Share button in the center of the meeting's lower toolbar.
- Select the desired screen you would like other participants to see.
- Click on the smaller Share button near the bottom, right side of the screen.
Hosts have the ability to stop a participant from sharing by right-clicking on the participant and changing their role.
While sharing your screen, there are multiple tools available. To reveal the collapsed toolbar, click on the orange You're sharing your screen. button at the top of the screen. The options include:
- Stop Sharing: remove your screen's view from the meeting
- Pause: freeze the displayed content
- Share: adjust what content you are sharing
- Assign: grant someone else the ability to share their screen
- Mute/Unmute: turn your microphone on or off
- Video: turn your camera on or off
- Participants: view and manage participants
- Chat: send messages to participants
- Annotate: draw or write over the displayed content
The floating panel on your screen displays the attendees. You can drag the panel to a second screen or resize it by dragging the corner to view more participants. Meeting participants will not see your grid, only what you are sharing on your screen.
Bottom Toolbar
At any point during the meeting, the toolbar at the bottom of the screen offers multiple buttons to help perform a variety of functions.

- Mute/Unmute: allows you to turn your microphone on and off as needed
- Start/Stop Video: allows you to turn your camera on and off as needed
- Share: allows you to share your screen with the rest of the meeting attendees
- Record: allows you to record the meeting's video and audio
- Raise Hand: allows you to notify others that you have a question to ask or something to say
- Reaction: allows you to select and briefly display an emoji reaction to something that someone is saying
-
Ellipses: provides additional action options
- The options vary depending on your role in the meeting.
- Leave/End: allows you to remove yourself from the meeting (or end it for everyone if you are a host/cohost)
-
Apps: allows you to use applications that are compatible with Webex, like…
- Slido: allows you to conduct polls and Q&As in Webex
- BasicOps: allows you to manage projects, tasks and notes in Webex
-
Participants: allows you to view and manage the meeting's attendees
- The management options vary depending on your role in the meeting.
- Chat: allows you to view any messages that are sent by attendees during the meeting
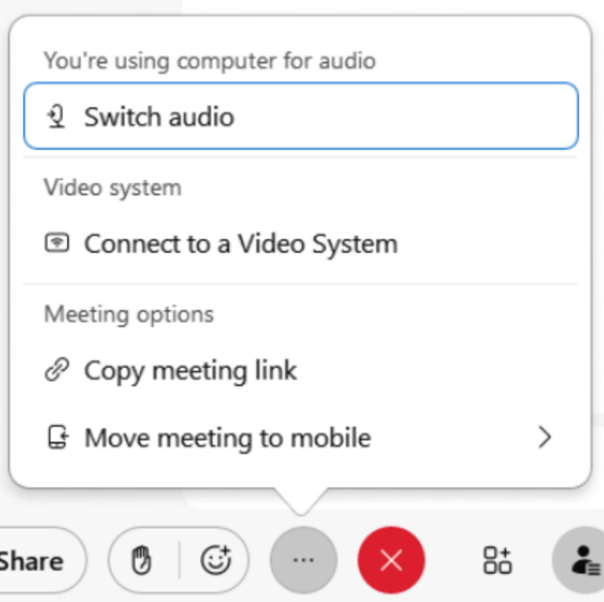
Additional Options for Attendees
Clicking on the ellipses button in the active meeting's toolbar opens a menu with the following options:
- Switch audio: allows you to change what microphone source you are using
- Connect to a Video System: allows you to cast your screen to another device, like a smart board
-
Copy meeting link: allows you to quickly copy the meeting's direct hyperlink to your clipboard
- Often used to send the link with others who have not joined the meeting yet.
- Move meeting to mobile: allows you to use your mobile device to transfer a Webex meeting from one computer to another computer without leaving the meeting
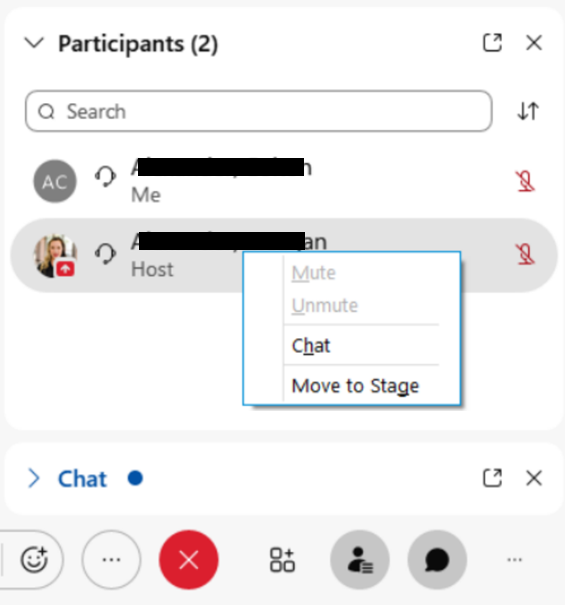
The Participants panel of Webex meetings lists all of the attendees. The Participants button in the toolbar allows you to open and collapse the panel as desired. Right-clicking on an individual participant's name allows you to select any of the following options:
- Chat: allows you to sent a private message to that person
- Move to Stage: allows you to make sure you can see that person displayed if you are using the “Stack” or “Side by Side” views
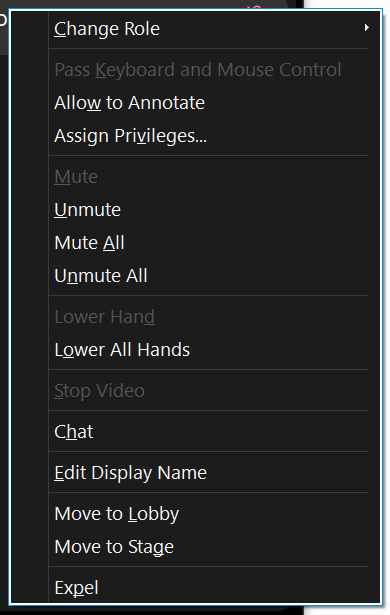
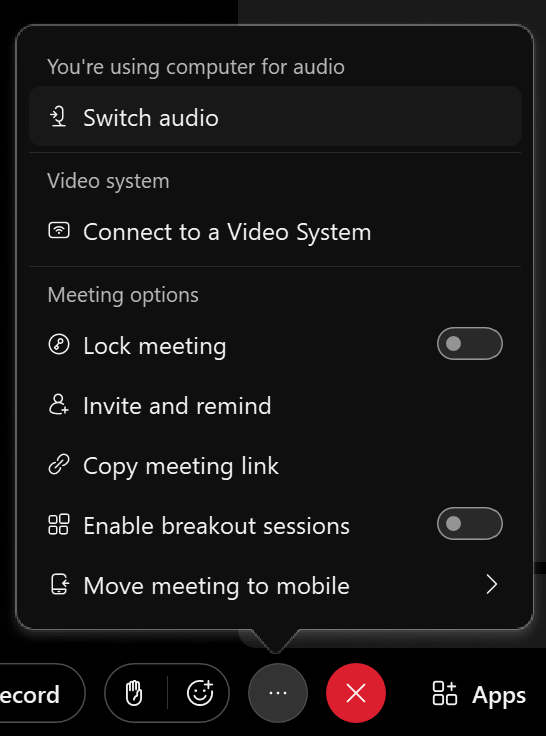
Additional Options for Hosts and Cohosts
Clicking on the ellipses button in the active meeting's toolbar opens a menu with the following options:
- Switch audio: allows you to change what microphone source you are using
- Connect to a Video System: allows you to cast your screen to another device, like a smart board
- Lock meeting: allows you to prevent anyone from dialing into the meeting
- Invite and remind: allows you to send an email invitation to additional people or send an email reminder to previously invited people
-
Copy meeting link: allows you to quickly copy the meeting's direct hyperlink to your clipboard
- Often used to send the link with others who have not joined the meeting yet.
-
Enable breakout sessions: allows smaller groups of participants to split off from the main meeting
- Please refer to the Webex Breakout Sessions Guide for more information.
- Move meeting to mobile: allows you to use your mobile device to transfer a Webex meeting from one computer to another computer without leaving the meeting
The Participants panel of Webex meetings lists all of the attendees. The Participants button in the toolbar allows you to open and collapse the panel as desired. Right-clicking on an individual participant's name allows you to select any of the following options:
- Change Role: allows you to change that participant's role in the meeting
- Allow to Annotate: allows you to grant annotation access to that participant
- Assign Privileges: allows you to grant privileges to that participant
- Unmute: allows you to manually turn that participant's microphone on
- Mute All: allows you to turn off ALL of the participants' microphones
- Unmute All: allows you to turn on ALL of the participants' microphones
- Lower All Hands: if any participants have recently used the Raise Hand button during the meeting, you can remove ALL of the displayed hands if you have acknowledge all of the questions/comments or are not accepting questions/comments at that time
- Chat: allows you to sent a private message to that person
- Edit Display Name: allows you to change that participant's displayed name in the meeting
- Move to Lobby: allows you to remove that participant from the active meeting and “wait” in the lobby until you let them back in
- Move to Stage: allows you to make sure you can see that person displayed if you are using the “stack” or “side by side” views
-
Expel: allows you to remove that participant from the meeting
- The word “expel” in Webex does NOT refer to a disciplinary action.